


In this tutorial I would like to show you how to insert and customize map objects in your map. I will confine myself here to the common formats MD3 and ASE. But before you get started, you should ensure that you have World of Padman installed correctly in the current version. Also the Q3Map2 compiler at least in version 2.5.16 and GtkRadiant 1.4 or later, including NetRadiant 1.5, for World of Padman must be properly installed and configured. With older versions, errors could occur when using this tutorial.
Insert map objects
There are two different entities that you can use to insert a map object, misc_model and misc_externalmodel. Both are accessible via the context menu (right-click) under misc and both need the correct path to a map object, which is normally found in World of Padman in the folder /models/mapobjects. The radiant opens automatically a file selection dialog for a misc_model, which you can use to directly select the map object. This is not done with a misc_externalmodel. While having the entity selected, you can use the [N] key to bring up the Enities menu window. By specifying model in the Key field, you must assign the path to a map object in the Value field (here: models/mapobjects/pad_ddmix/trashcan/garbage_bag_group.md3). Confirm the entry with the [ENTER] key. Please note that the path must always be given with a slash instead of a backslash, as is common in Unix systems. For an overview of existing map objects in World of Padman and their paths, see the catalog: map objects.
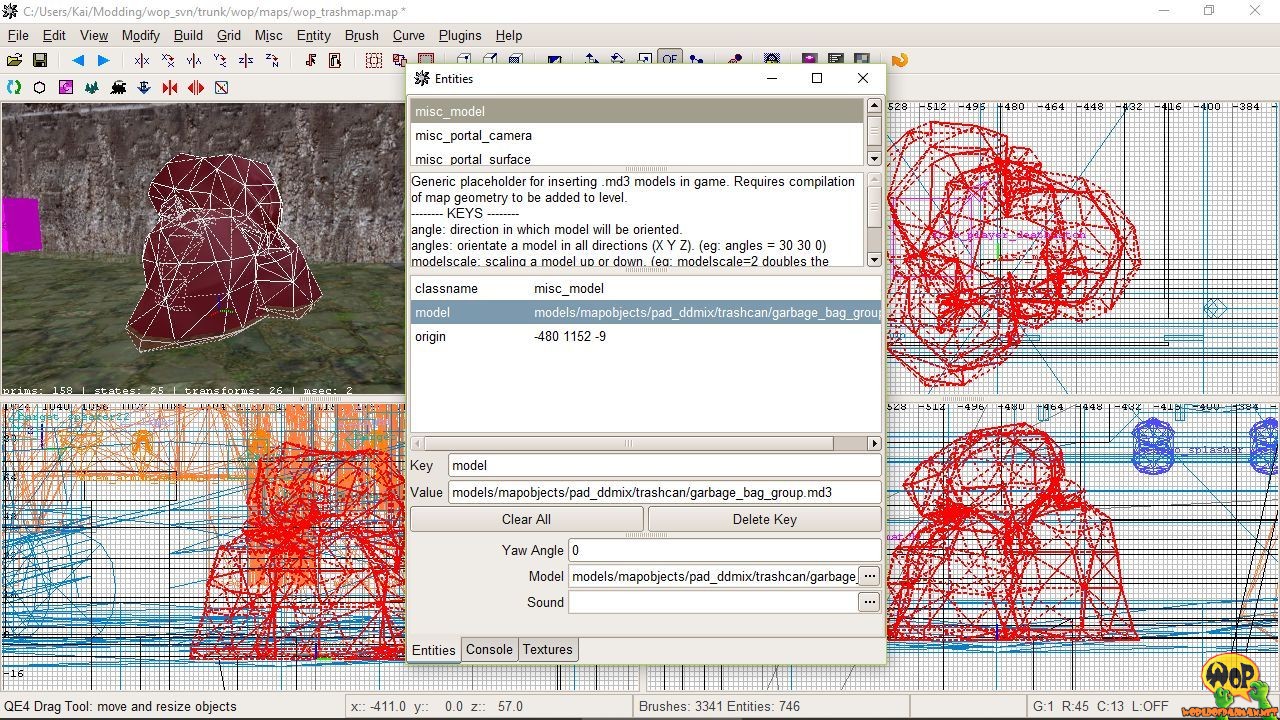
Entity misc_model with key model for the path specification
misc_model
Using the entity misc_model during compilation causes the map object to be included as a fixed component in your map. This means that you do not have to add the map object (MD3/ASE) additionally to the PK3 file of your map, since it is now part of the BSP file. The associated texture, on the other hand, must be part of the PK3 file. If you use map objects from WoP, these are already part of our PK3 files, including the texture and shaders, and you no longer need to include them in your PK3 file. Since the map objects do not occupy much space, we have decided since WoP 1.5 to always include these files in the PK3 files, although this would not be necessary with the misc_model method. They are therefore no longer offered as an extra download.
misc_externalmodel
Using the misc_externalmodel entity causes the map object not to be included in the BSP file during compilation, which allows maximum flexibility. For example, we use this method to make the sprayroom teleporter appear in the maps only in the game modes Spray Your Color and Spray Your Color Team. One drawback is that the GtkRadiant displays a misc_externalmodel only as a small orange box and not the map object itself. So to be able to position the map object correctly, there is a little trick. First, insert the map object via an entity misc_model and make all the desired settings in the Entities menu window. Then select the entry classname and change the value in the Value field from misc_model to misc_externalmodel. NetRadiant, on the other hand, does not have the problem and always displays the map object with this method, so this is not necessary there. With the method misc_externalmodel, the map object itself must be part of the PK3 file as well as the texture. Again, if you are using map objects from WoP, they are already included with texture and shaders in our PK3 files and no longer need to be included in your PK3 file.
Special feature ASE
A special feature should be considered when inserting map objects that are in ASE format. In contrast to the MD3 format, map objects in ASE format are not automatically included in the lightmap during the light calculation and always appear very bright in the map. You can prevent this by entering the key spawnflags with the value 4 in the Value field in the Entity menu window. The Q3Map2 compiler will then automatically include the ASE map object in the lightmap.

Entity misc_model with ASE format and key spawnflags 4 for light calculation
Rotate map objects
Previously, rotation options were limited to the z-axis of a map object because you could only use the key angle. The Q3Map2 compiler gives you more options for rotation. With the very similar key angles you can rotate the map object around all three axes. To do this, you must enter values between 1 and 360 degrees for each individual axis in succession and separated by a space in the Value field. The first value defines the rotation about the X-axis, the second value about the Y-axis and the third value about the Z-axis. Decimal values are always entered with a decimal point and not a decimal comma.
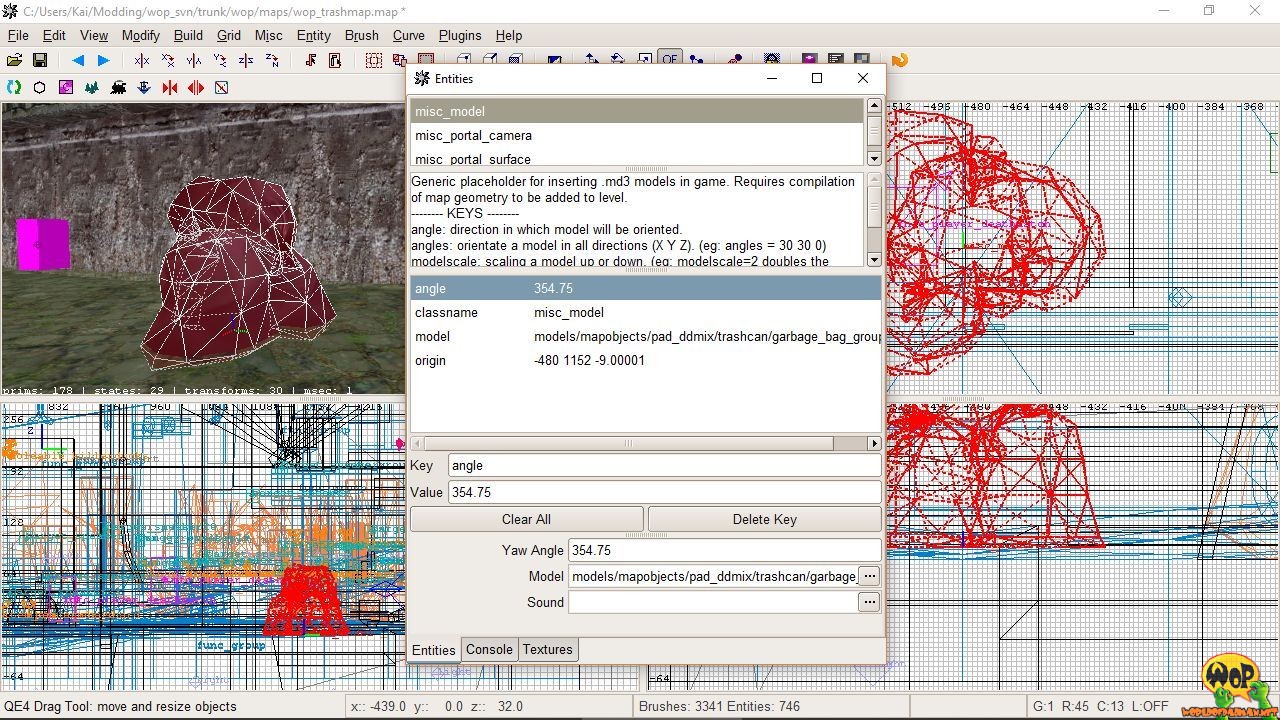
Entity misc_model with key angle for simple rotation
If you do not fancy the Entity menu window, you can also call the Rotate function by pressing the [R] key when the map object is selected (can also be reached via the toolbar) and rotate the map object directly with the mouse. Alternatively, you can also call up a small input dialog via the main menu Modify > Arbitary Rotation and enter the values for all three axes directly there. In both methods, the radiant will make the entry of the Keys angles with the appropriate values for you.

Entity misc_model with key angles for a more complex rotation
Please note that the two keys angle and angles can not be used simultaneously in the same entity.
Scale map objects
Another advantage of using the Q3Map2 compiler is that you can freely scale map objects and no longer have to be in different and appropriate sizes, as they used to. You can use the key modelscale to proportionally scale up and scale down a map object. Entering values between 0 and 1 in the Value field causes a reduction by the corresponding factor. Entering values greater than 1 causes an increase by the corresponding factor. Decimal values are always entered with a decimal point and not a decimal comma.
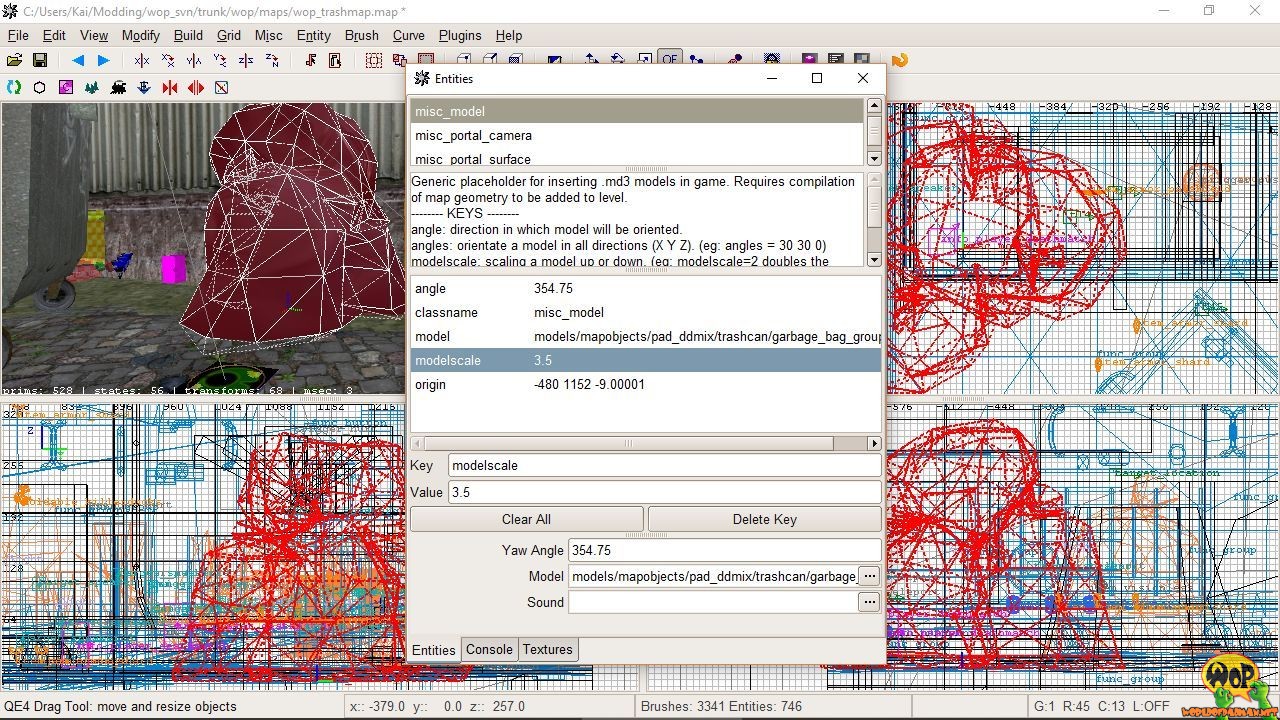
Entity misc_model with key modelscale for simple scaling
Another option is the key modelscale_vec, which allows you to individually compress or stretch a map object in each of the three dimensions. To do this, you must enter decimal values for each individual axis in succession and separated by a space in the Value field. The first value defines the scaling along the X-axis, the second value along the Y-axis and the third value along the Z-axis.
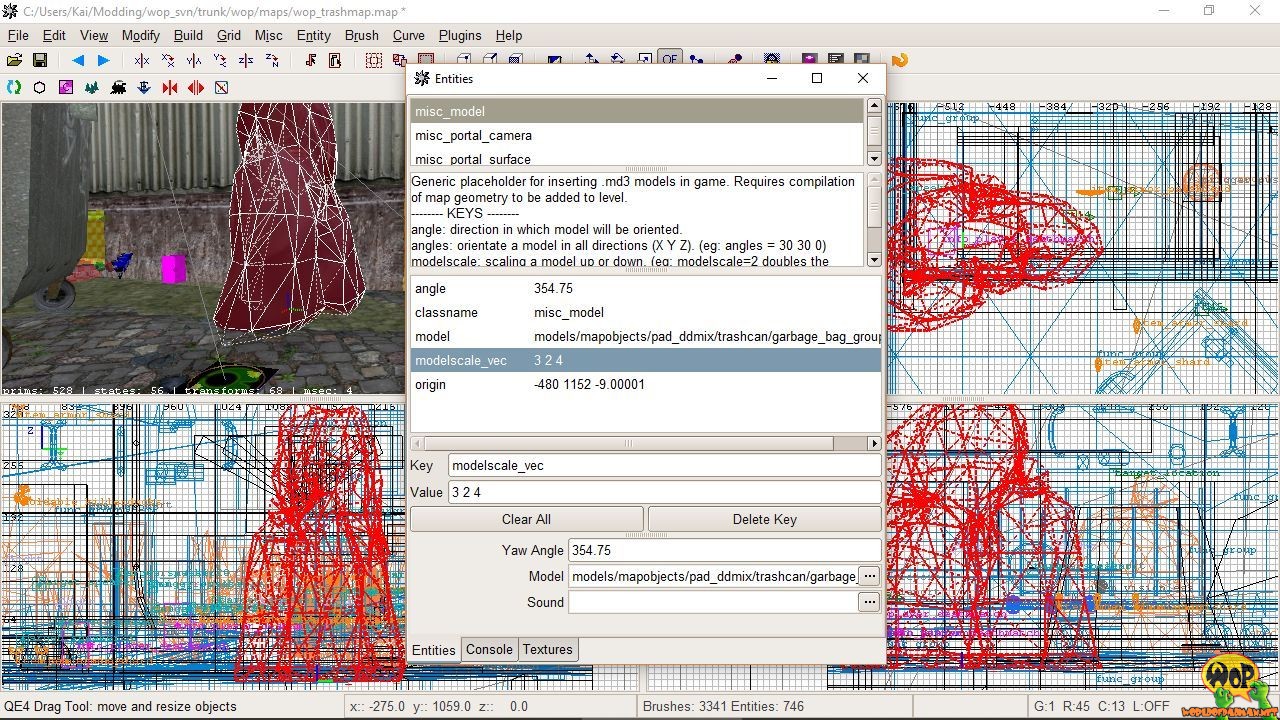
Entity misc_model with key modelscale_vec for more complex scaling
Please note that the two keys modelscale and modelscale_vec may not be used simultaneously in the same entity. The two described scaling methods work only with misc_model entity and not with misc_externalmodel entity. Also keep in mind that if you scale up too much, the map object texture will stretch too, which sometimes looks bad.
Clip map objects
Usually, map objects are permeable to bots, players, and gunfire. So you can easily run or shoot through them if you do not clip them. To effectively clip a map object, just put a few simple brushes in the rough basic shape of the model in the same place so that they completely enclose the map object. Assign to all surfaces of those brushes the texture common/fullclip to block players, bots and gunfire. This method takes a little more time, but is a good way to ensure the performance of the map.
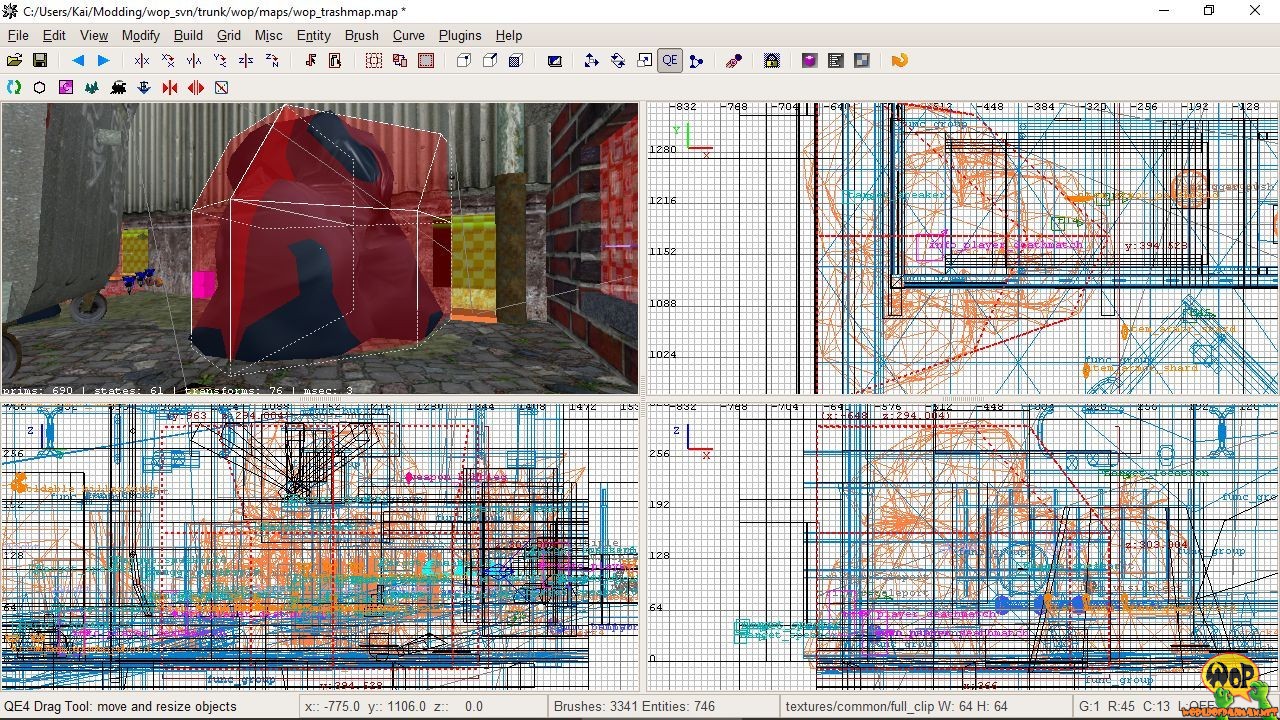
Brushwork for clipping a misc_model with the texture fullclip
A second possibility results from the use of the key spawnflags with the value 2 in the Value field in the Entities menu window. This causes the Q3Map2 compiler to automatically clip map objects during compilation, without the use of additional clip brushes. This method is very comfortable, but with complex map objects there is a high risk that the performance of the map drops sharply as soon as the map object is shot. For this reason, this should only be done on very simple map objects with few polygons. Otherwise, this method has the same effect and also blocks players, bots and gunfire.

Entity misc_model with ASE format and key spawnflags 6 for clipping and light calculation
Please note that a map object in ASE format may have already received a spawnflags with the value 4 for the calculation of the lightmap. In this case you have to add the spawnflags with the value 2 for the clipping. So if you want both, lightmap and clipping, you have to enter the key spawnflags with a value of 6 in the Value field.
Move map objects
To make a map object move in a map, you can use a few functions that are actually meant for brushwork. This usually includes func_bobbing, func_button, func_pendulum, func_plat, func_rotating, func_train etc. What is meant at this point is really just the movement of the position of a map object. In principle, the map objects are also subject to the already mentioned restrictions of the method misc_externalmodel, therefore scaling is not possible.
In order to apply this method, you first create at the point where the map object is to appear later, a small brush in the dimensions of, for example, 16 x 16 x 16 units and assign to all its surfaces the texture common/origin. You’ll need another simple brushwork in the approximate size of the map object to clip it. Assign to all surfaces of those brushes the texture common/fullclip to block players, bots and gunfire. To figure out the dimensions of the model, you could temporarily insert it via misc_model, but then delete it. Then select the complete brushwork including the origin brush and make it via the context menu (right click) to a func_ * of your choice. If the complete func_ * is still selected, open the Entities menu window with the [N] key and enter model2 into the Key field. As a value, you must now enter the path to the map object correctly in the Value field (e.g. models/mapobjects/pad_fish/flame_angel05.md3).
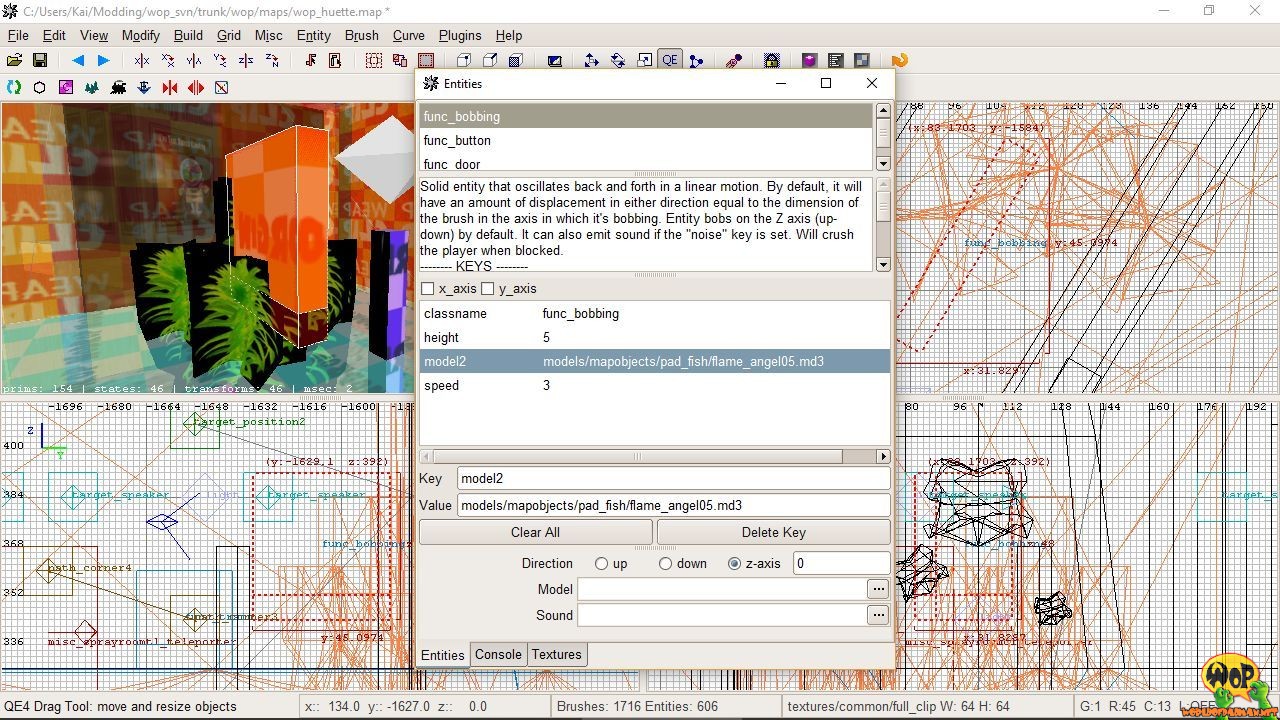
Entity func_bobbing with origin brush, fullclip brush and key model2 for path specification
After compiling, the desired map object should now appear and move accordingly. It will always be aligned with the center of the origin brush. If the map object is not in the right place, it may be due to the improper positioning of the model tag itself, which defines the coordinate origin of the map object. In this case you have to move the origin brush in the func_ * until its center exactly matches the model tag of the map object. This is usually shown to you in the Radiant if you have selected the map object.
Alternatively, you can omit the origin brush and enter the required coordinates via the key origin directly into the func_ *. To do this, you must select the func_ * and enter the values in units for the three dimensions X, Y and Z one after the other and separated by a space in the Value field in the Entities menu window. These must match the coordinates of the model tag. You can determine the coordinates of the model tag by temporarily inserting the map object via a misc_model and aligning it correctly. The entity misc_model also has the key origin with the appropriate coordinates, which you can view and copy from the Entities menu window. This is a bit awkward, but surefire. Do not forget to delete the misc_model entity again.
Animated map objects
Since WoP 1.5 you have the possibility to insert map objects into your map that have an animation. In principle, the map objects are also subject to the already mentioned restrictions of the method misc_externalmodel with respect to the rotation. Scaling is not possible.
You can insert the map object into your map in the classic way, but you absolutely have to use the method misc_externalmodel described above. There are now three new keys for the entity, which you must define according to the animation contained in the model file.
- The key animationStart defines the first frame from which the animation is to be played. Usually the value is 0.
- The key animationEnd defines the last frame up to which the animation should be played. Usually the value is greater than 0.
- The key animationFPS defines the number of frames to be played per second. Usually the value is 30.
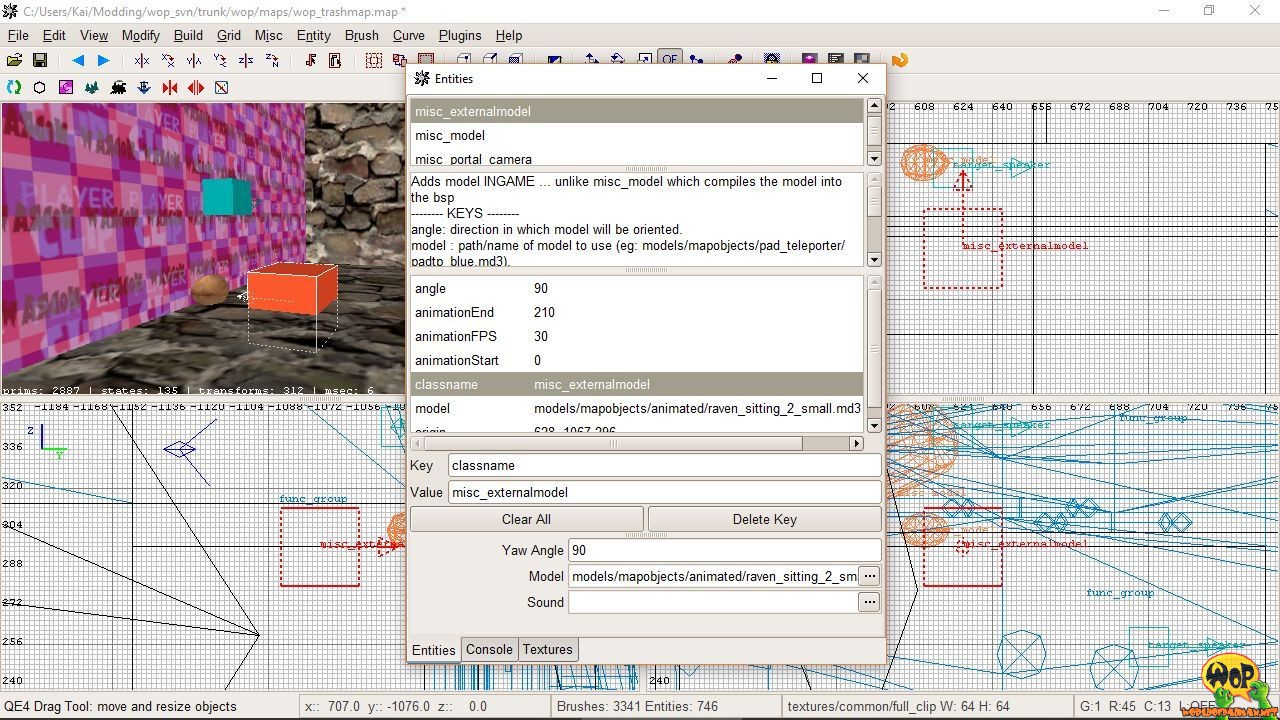
Entity misc_externalmodel with keys animationStart, animationEnd, animationFPS for animation
The animation generally always starts from the start of the map and is then played continuously in a loop. There is no way to start, stop or otherwise influence the animation via a trigger. It is possible to start the animation in the middle by specifying animationStart with a value greater than 0. By specifying animationEnd with a value less than the number of existing frames, the animation can be stopped in the middle. Both, however, leads to a nasty jump in the animation. Specifying animationEnd with a value greater than the number of existing frames will delay the restart of the animation. During this time, the map object is completely idle. Specifying animationFPS with values less than 30 slows down the animation, and specifying values above 30 accelerates the animation. Whether this is somehow useful in your map, I leave to you.
You can get an overview of animated map objects in World of Padman and corresponding path information, keys and values in the catalog: map objects (search for ‘animation’).