


In this tutorial I want to show you how to convert your self-created brushwork from a map file into an ASE file as a map object. But before you start you should make sure that you have installed and configured the Q3Map2 compiler at least version 2.5.16 and the GtkRadiant 1.4 or newer for World of Padman. With older versions, you may encounter errors when using this tutorial.
Introduction
Creating an ASE map object from existing brushwork of your map can have some advantages. Rotating and scaling complex brushwork can often lead to unwanted effects and shifts in your construction. Exporting your brushwork as a model in ASE format makes sense, because it can be easily re-imported into Radiant as a map object, which can then be rotated and scaled without restrictions. Another advantage is that an ASE map object references the textures from your map and therefore does not need an extra UV map. It is also a simple text file and can be edited directly in a text editor (e.g. Notepad++) in order to adapt texture paths that have been changed afterwards. Also in the case that the adjustable grid sizes in the radiant limit you too much, an export can be helpful. Have you ever thought about making your brushwork much bigger and therefore more detailed and then simply inserting it again as a map object scaled much smaller?
Of course, such an ASE map object also has disadvantages. You can only implement the ASE map object using the misc_model entity, so it must be included in the BSP of your map. It is not possible to include the ASE Map object via the entity misc_externalmodel or via the key model2 of any func entity. In contrast to the MD3 format, ASE map objects are not automatically considered during the light calculation, i.e. they appear very bright in the map later. However, this can easily be corrected afterwards (see last section). So you see, the MD3 format is still justified.
Preparing brushwork
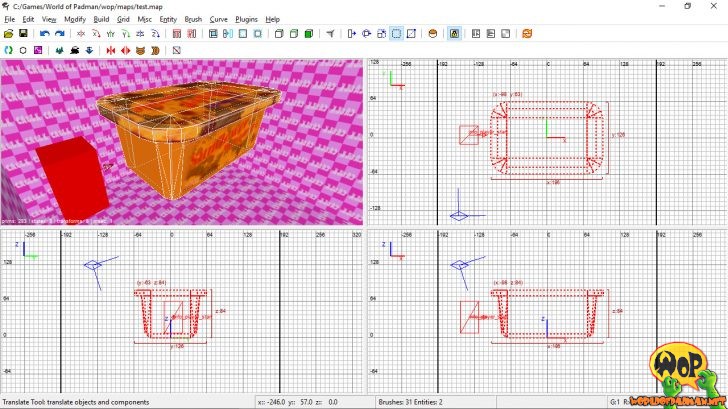
To create an ASE map object, you need nothing more than your ready textured brushwork, which you have copied into an empty MAP file. It must have at least one brush with the property structural, otherwise no ASE file will be created later. The positioning of the brushwork towards the coordinate origin of the grid in the Radiant is crucial, since this also defines the tag, i.e. the coordinate origin of the ASE map object. Therefore, for example, a table should be positioned centered above the coordinate origin in the grid of the Radiant, while a lamp should be positioned centered below. If you do not center your brushwork correctly before converting, it will not appear centered on the misc_model entity.
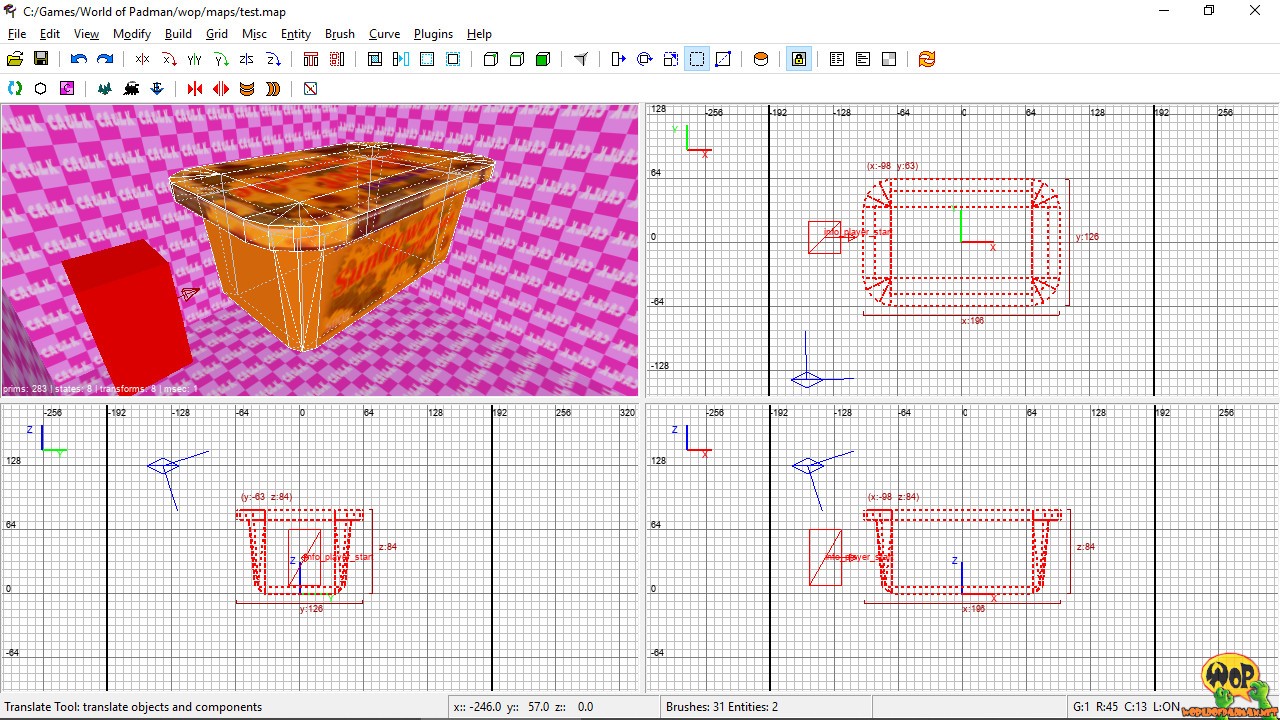
Brushwork with info_player_start and room with caulk texture
Create a room around the brushwork that completely envelops the construction and apply the texture common/caulk to all six brushes of the room. In addition, all surfaces of your brushwork, which cannot be visible later in the game after positioning the map object anyway, should also have the caulk texture. These surfaces will then not be textured and thus unnecessary polygons will be saved. Finally you have to insert the entity info_player_start somewhere in the room and save the map under the name of the later map object, e.g. myASEmapobject.map.
Converting brushwork
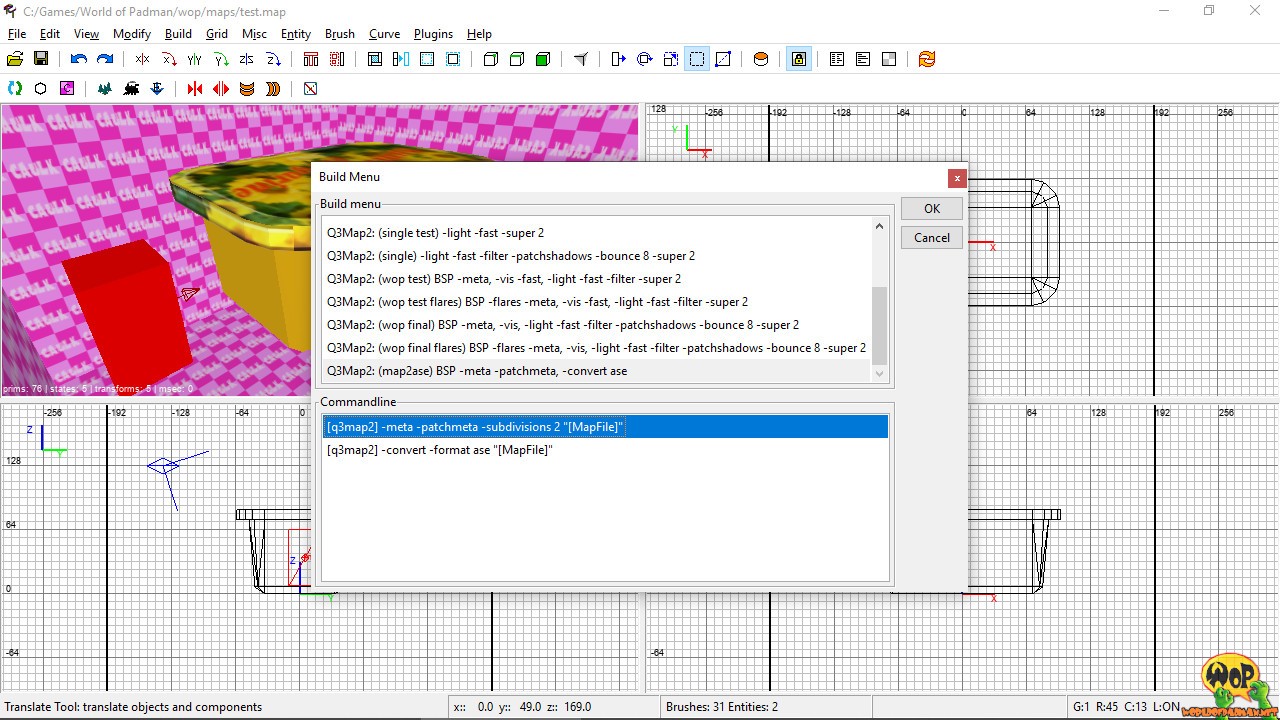
There are several ways to convert your brushwork. But all of them use the same method. You can compile your small map e.g. via the build menu of the Radiant. To do so you have to select the command map2ase which we created there for this very purpose.
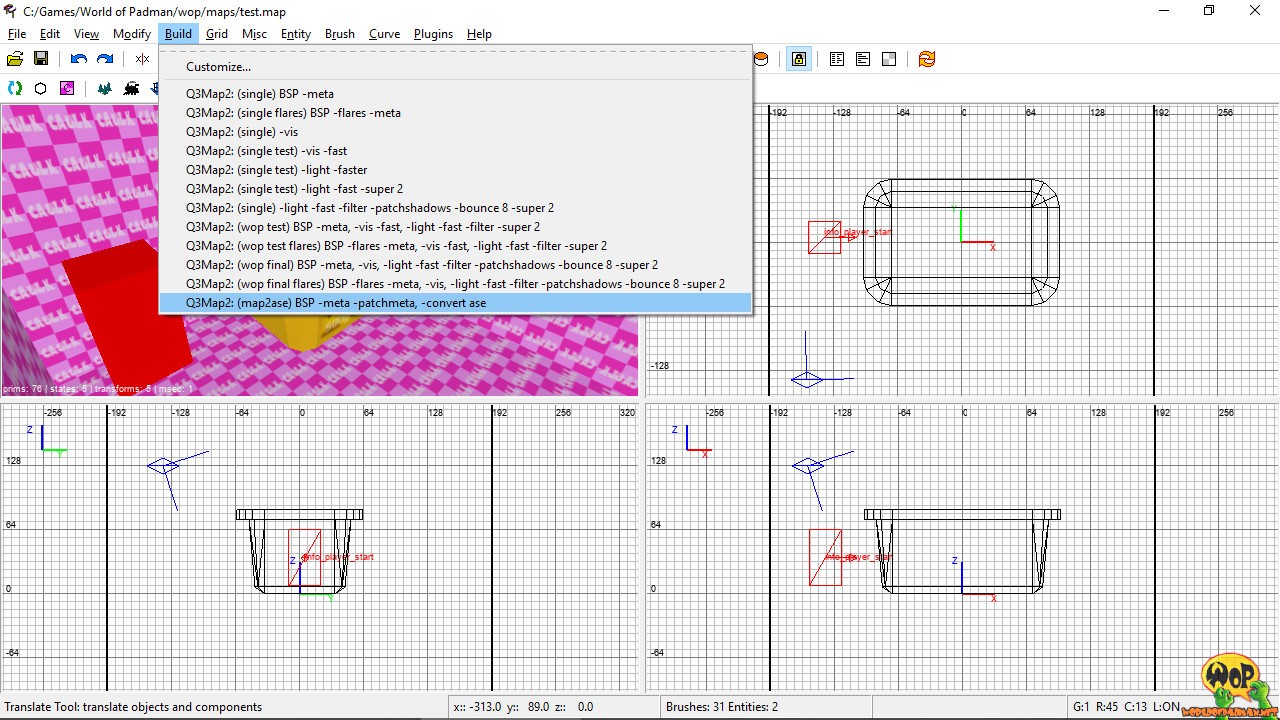
Build menu in Radiant with map2ase command
Alternatively, you can of course compile without the build menu by creating a batch file (BAT) containing the following commands. This is a simple text file that can also be started directly by double-clicking on it in Windows. It contains the paths to the Q3Map2 compiler and to your map, which of course you have to adapt to your situation. Actually it is two commands that are executed one after the other. First a BSP file is created from the MAP file and second step an ASE file is created from the BSP file.
"C:\mypathtoq3map2\q3map2.exe" -meta -patchmeta "C:\Program Files\World of Padman\wop\maps\myASEmapobject.map"
"C:\mypathtoq3map2\q3map2.exe" -convert -format ase "C:\Program Files\World of Padman\wop\maps\myASEmapobject.bsp"
As a third possibility you can also use Q3Map2Build for compiling. In a first step, you activate only the -meta -patchmeta switches under Options in BSP, click on Save and then on Build. You must deactivate all other calculation phases (VIS, LIGHT and BSPC). In a second step you activate again in BSP under Options only -convert and enter the character string ase next to it, if it is not already listed there. Then you click Save again and then Build. Here too, all other calculation phases remain deactivated (VIS, LIGHT and BSPC).
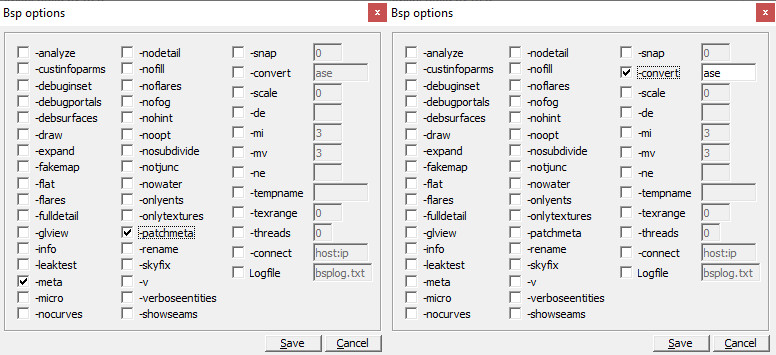
Q3Map2Build BSP 1st step (left) and BSP 2nd step (right)
No matter which way you use, after the compilation was finished successfully, you will find the new ASE file in the maps subdirectory of your WoP installation. For the sake of order, create a new directory of your choice, e.g. under models/mapobjects/mymapobjects/ and move your ASE map object there.
More detailed patches
If, in addition to brushes, you have also used patches, i.e. curved surfaces, and if these appear too angular after compiling the ASE model, you can increase the number of subdivisions to be made in your geometry using the parameter subdivisions by specifying a value of 0 and greater. The higher the value, the higher the triangulation, but this can affect the performance in the game. So, depending on the size of the patches you use, this is where you should try it out. The parameter can be considered directly in the first BSP step of the BAT file.
"C:\mypathtoq3map2\q3map2.exe" -meta -patchmeta -subdivisions 2 "C:\Program Files\World of Padman\wop\maps\myASEmapobject.map"
"C:\mypathtoq3map2\q3map2.exe" -convert -format ase "C:\Program Files\World of Padman\wop\maps\myASEmapobject.bsp"
Alternatively you can also configure the map2ase command in the main menu of the Radiant under Build > Customize… yourself. Unfortunately Q3Map2Build does not offer this parameter, at least I haven’t found it yet.
Customize the map2ase command in the build menu of the Radiant
Importing the map object and setting spawnflags
Now you are able to import your previously converted brushwork as a new map object into your map via the entity misc_model. Open the Entity Inspector by pressing the key N and enter as key spawnflags with the value 4. This will cause the Q3Map2 compiler to take the model into account during the LIGHT calculation phase and thus automatically provide it with a light map. If you also want to automatically clip the map object, you have to enter a 6 instead of a 4 for the key spawnflags.
- spawnflags 2: automatic clipping
- spawnflags 4: generate lightmap
- spawnflags 6: automatic clipping & generate lightmap
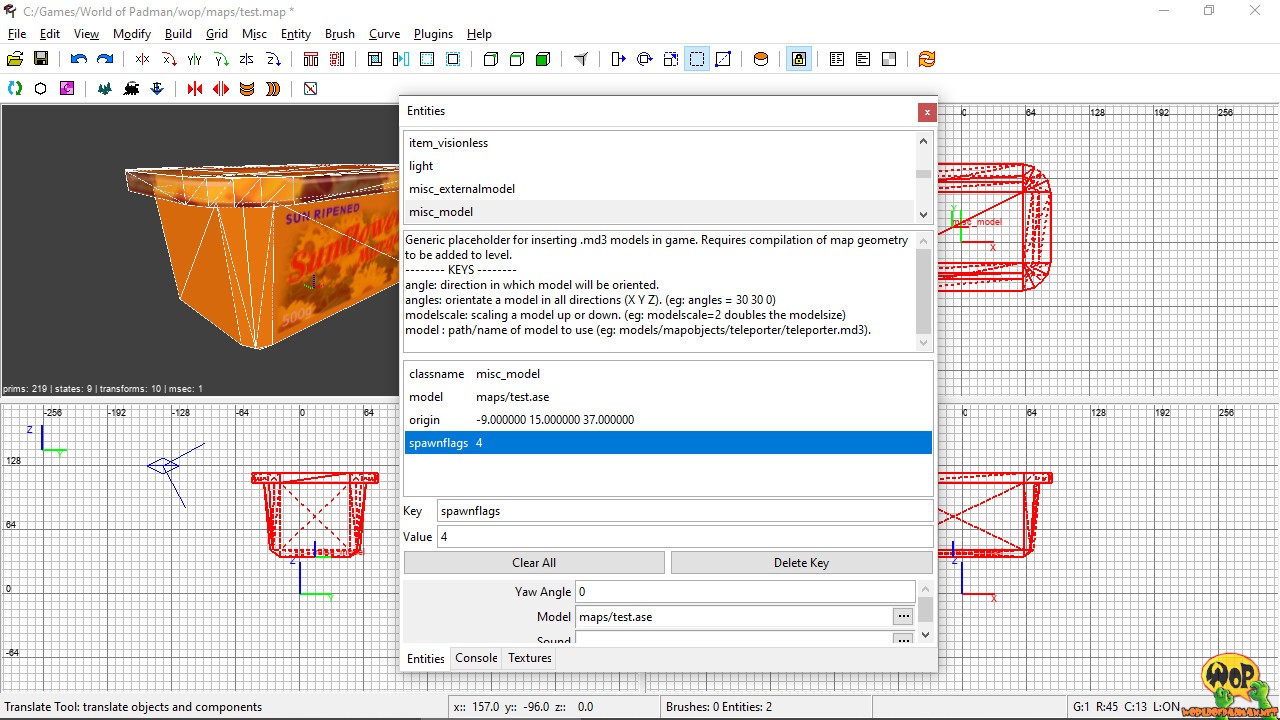
Import of the ASE map object via misc_model and generated lightmap using spawnflags 4
Apart from the restrictions already described in the first section, you can adjust your ASE map object, like any other map object, by scaling and rotating it. For further information, please refer to the tutorial handling map objects.