


In this tutorial I would like to show you how to install and configure the level editor GtkRadiant 1.5 on Windows and to configure it for World of Padman. But before you start, make sure that you have World of Padman correctly installed in the current version. With older versions, errors could occur when using this tutorial.
The GtkRadiant 1.5 is in my opinion one of the best editors for games with the id-Tech3 engine. Unfortunately, GtkRadiant 1.5 has wrapped up development and version 1.5.0 is the last stable release. There are separate tutorials for fans of other Radiant versions:
Download
For example, you can download the GtkRadiant 1.5 for Windows as an universal installer (msi) from the website Radiant Level Design Tools.
GtkRadiant 1.5 for Windows (32 bit)
( 7,6 MB | GtkRadiant-1.5.0.msi | MD5: dedee7a853b1f5b46e0ef4544aa7bc83 )
Installation
To install GtkRadiant 1.5 start the universal installation routine. Follow the instructions until you can select the option Custom for custom installation, because we will not need all the components. If you open the options tree in the following dialog box, several components are offered for installation. It is best to disable all displayed Game Support Packages, if you only want to create maps for World of Padman. If you decide for other games later on, you can of course reinstall the corresponding packages without any problems. The listed plugins and the editor manual can sometimes be very helpful, so you should completely install them. Select a destination folder (here: C:\Users\Kai\Modding\Tools\GtkRadiant 1.5.0) and follow the rest of the installation routine instructions.
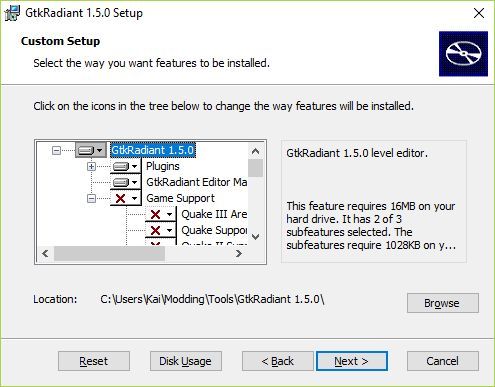
GtkRadiant 1.5 – custom setup
Please note: Since you do not have a Game Support package installed, there will be an error message when starting the GtkRadiant 1.5. To avoid this, do not start the GtkRadiant 1.5 until you have completed the following steps.
WoP Game Support
For the GtkRadiant 1.5 to work with World of Padman, you will need the archive files WoP radiant files.zip and WoP mapping files.zip we have prepared for you. Since WoP 1.5 they are already stored in the installation directory under XTRAS\editing files, so there is no extra download necessary anymore. The files may receive some updates from time to time, but then are always delivered with a new releases of WoP.
In the first step unzip WoP radiant files.zip directly into the installation folder of GtkRadiant 1.5 (here: C:\Users\Kai\Modding\Tools\GtkRadiant 1.5.0). Please note, that the subdirectories in the archive must be properly unpacked too. After that, as shown in the following figure, the subdirectories games, wop.bspc and wop.game should appear in your target folder.
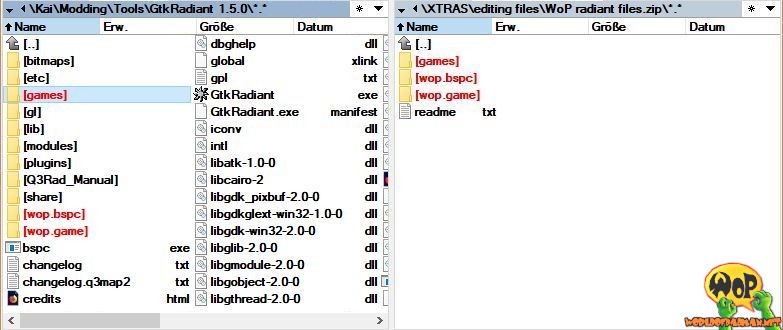
WoP radiant files – archive content (right) and target folder (left)
In the second step unzip WoP mapping files.zip into your World of Padman installation directory (here: C:\Games\World of Padman). It will install a script and sample maps for the different game modes, which should make it easier for you to work on your own maps later on. Now you should find new subfolders like maps and scripts in your wop subfolder (here: C:\Games\World of Padman\wop). An accompanying readme file with further information in English is enclosed with the ZIP file. All map objects and environment boxes used by us (skyboxes) are already included in the WoP installation and no longer need to be installed separately. Related paths to work faster in GtkRadiant 1.5 can be found in the specially created catalogs.
Configuration
Now you can start the GtkRadiant 1.5 for the first time. In the displayed dialog Global Preferences you should now be able to select World of Padman in the drop-down list. I recommend you to enable the option Enable Logging and to disable the option Show Global Preferences, if you only want to create maps for World of Padman. If you simply keep the last option enabled, you can decide for yourself which of the supported games you would like to create a map each time you launch GtkRadiant 1.5, if you have additional Game Support packages installed.

GtkRadiant 1.5 – global preferences
If the correct path to the World of Padman installation can not be found at first attempt, you must manually specify it (here: C:\Games\World of Padman\wop). This is the folder where the wop.exe file is located.
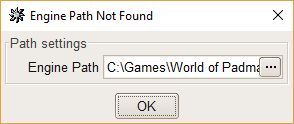
GtkRadiant 1.5 – WoP engine path
Now the GtkRadiant 1.5 should open normally with the default settings and look like shown in the following figure. If the GtkRadiant 1.5 does not start on Windows or only with one error, please read the last section of this tutorial.
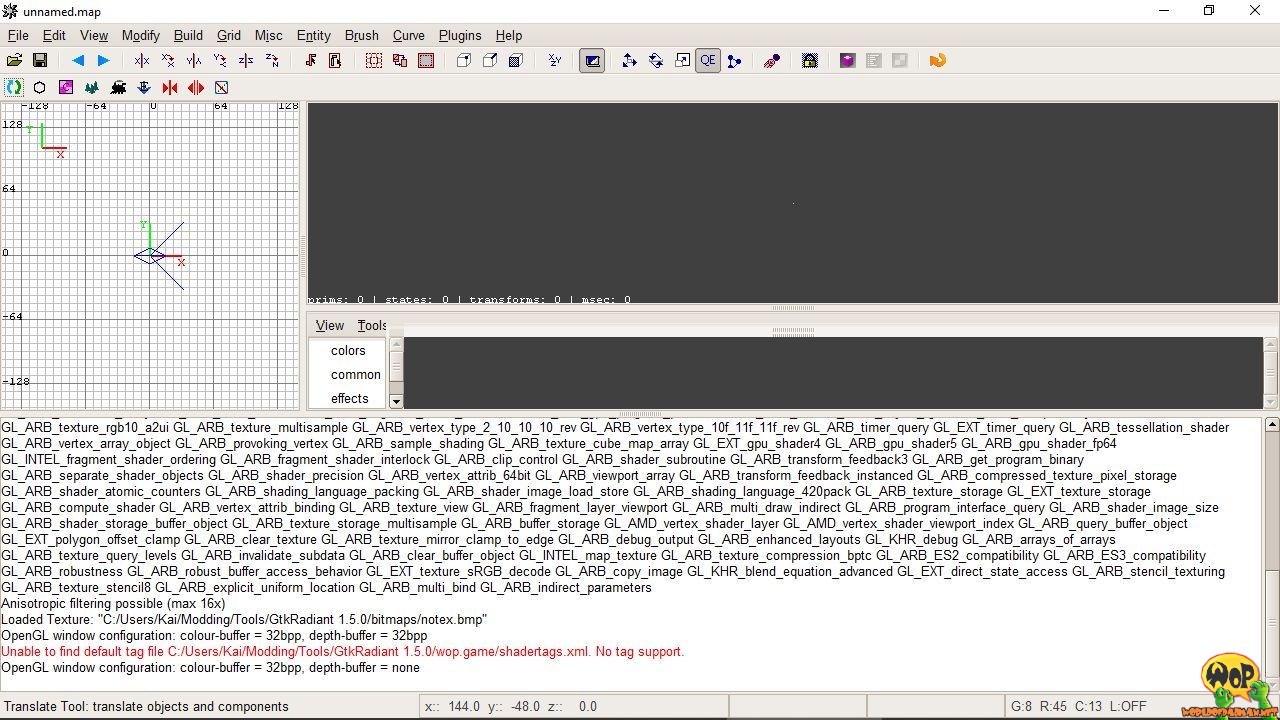
GtkRadiant 1.5 – default layout
If you also face the error message Unable to find default tag file C:/Users/…/wop.game/shadertags.xml. No tag support. in the console, you can easily remove it by automatically generating a corresponding file via the main menu under Plugins > ShaderPlug > Create tag file.
Since the level editor is now set up correctly for World of Padman, you can make other settings as you wish in the main menu under Edit > Preferences…. If you are using the GtkRadiant 1.5 for the first time, I recommend the following settings:
- Interface > Layout: enable the third option of Windows Layout to activate the four-window layout.
- Display > Entities: enable the option Show Light Radii to visualize the light range of the light entities.
- Settings > Grid: Set Default grid spacing to 1 to use a finer grid by default.
- Settings > Camera: disable the option Enable far-clip plane to see the complete map by default, if the level editor runs smoothly enough.
- Settings > Orthographic: enable the option Display size info to show by default the dimensions of the currently selected brush.
- Settings > Clipper: enable the option Clipper tool uses caulk to apply the caulk texture on every new created surface by default, while using the Clipper tools.
- Settings > Build: enable the option Enable Build Process Monitoring to see progress in the console while compiling the map from the build menu.
- Settings > Build: enable the option Stop compilation on leak to stop and cancel the compilation process automatically when a leak error is found.
- Settings > Texture Browser: Set the option Load Shaders at Startup to Common to preload at least the much-used common shaders at startup.
A restart of the editor is now necessary. After that, the editor should look like this.
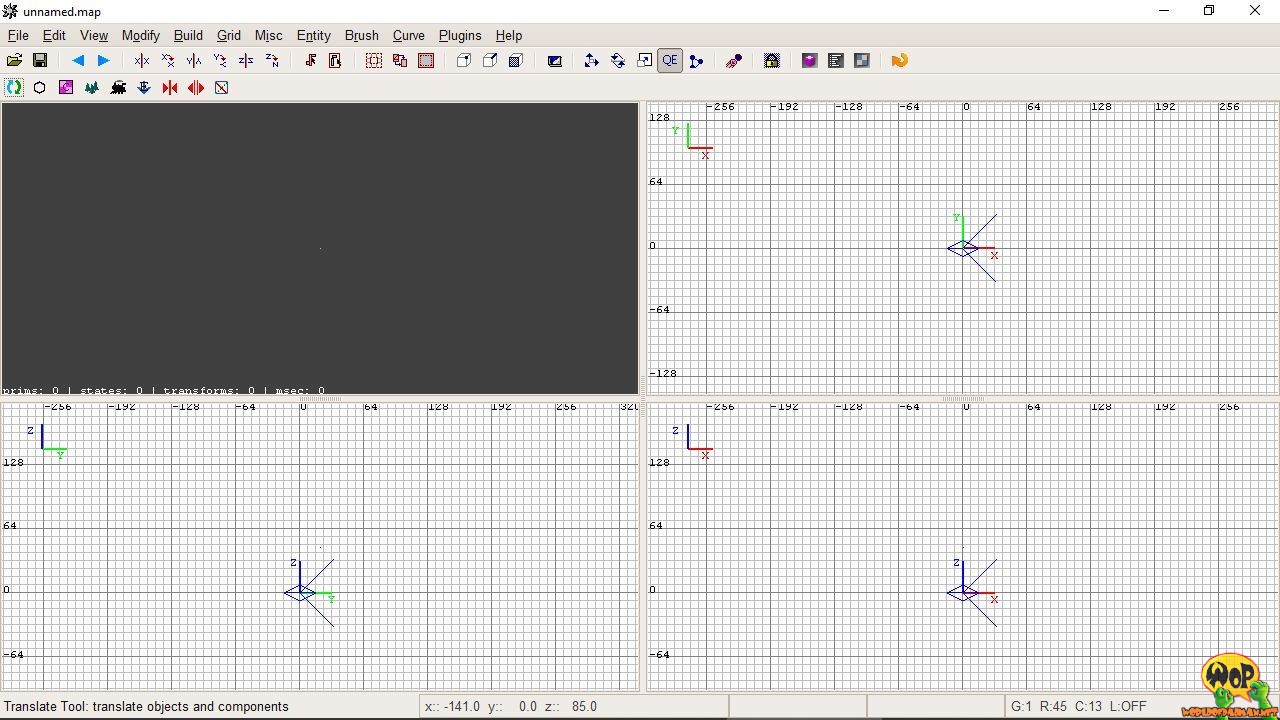
GtkRadiant 1.5 – four-window layout
Troubleshooting
The GtkRadiant 1.5 does not always start on all Windows systems without any problems and sometimes an error message appears assertion failure: module system failed to initialize – see radiant.log for error messages. This is a well-known problem and can be fixed very easily by downloading and installing at least the Microsoft Visual C++ 2005 Redistributable Package (x86). Thereafter, the Radiant 1.5 should start without error.