


In this tutorial I want to show you how to compile World of Padman completely or parts of it yourself, so you can make changes to the source code for your own modifications or support us directly in fixing bugs. You will need some software, but you can download it for free from the internet. Of course there are some good alternatives to the programs I suggested and used here. But since this tutorial should also be suitable for beginners, who may have never compiled WoP themselves before and are not familiar with suitable programs, I make a selection here, which worked well for me. Beyond that, I’ll limit myself here to installing and setting up the necessary components under Windows. By the way, I’m pretty much starting from scratch, so feel free to skip the sections you already know.
GitHub and GitHub Desktop
The current state of the source code of World of Padman is located in the worldofpadman repository on GitHub. GitHub is a network-based version control service based on the version control system Git and is free of charge in the basic plan. While it’s not necessarily a requirement for this tutorial, if you want to support us directly and in turn share your code changes with us, I recommend you create an account on GitHub and follow the rest of this section. You could also do completely without GitHub by downloading our source code via the green code button in the upper right corner of the repository on GitHub, e.g. directly as a ZIP archive, but I don’t recommend that, as you will then be missing a useful versioning management. So, after you have created an account, you can simply fork our worldofpadman repository. Click on “Fork” in the upper right corner, below your user icon, and you will create a copy of the repository directly in your account, which you can then continue to work with.

worldofpadman repository on Github
If entering commands into a console isn’t your thing right now, the next thing you might need is a graphical user interface for Git, such as GitHub Desktop, so that you can easily synchronize the development status between the local repository on your computer (which we haven’t created yet) and the repository in your GitHub account in the future. Download it directly from the website and follow the installation instructions. If you are asked to enter your GitHub account information, feel free to do so. GitHub Desktop needs your login credentials to log in and authenticate on GitHub. Next, you should see a “Let’s get started!” dialog, where you can directly select the worldofpadman repository you forked under “Your repositories” (yourusername/worldofpadman). After selecting it, click on “Clone yourusername/worldofpadman” at the bottom.
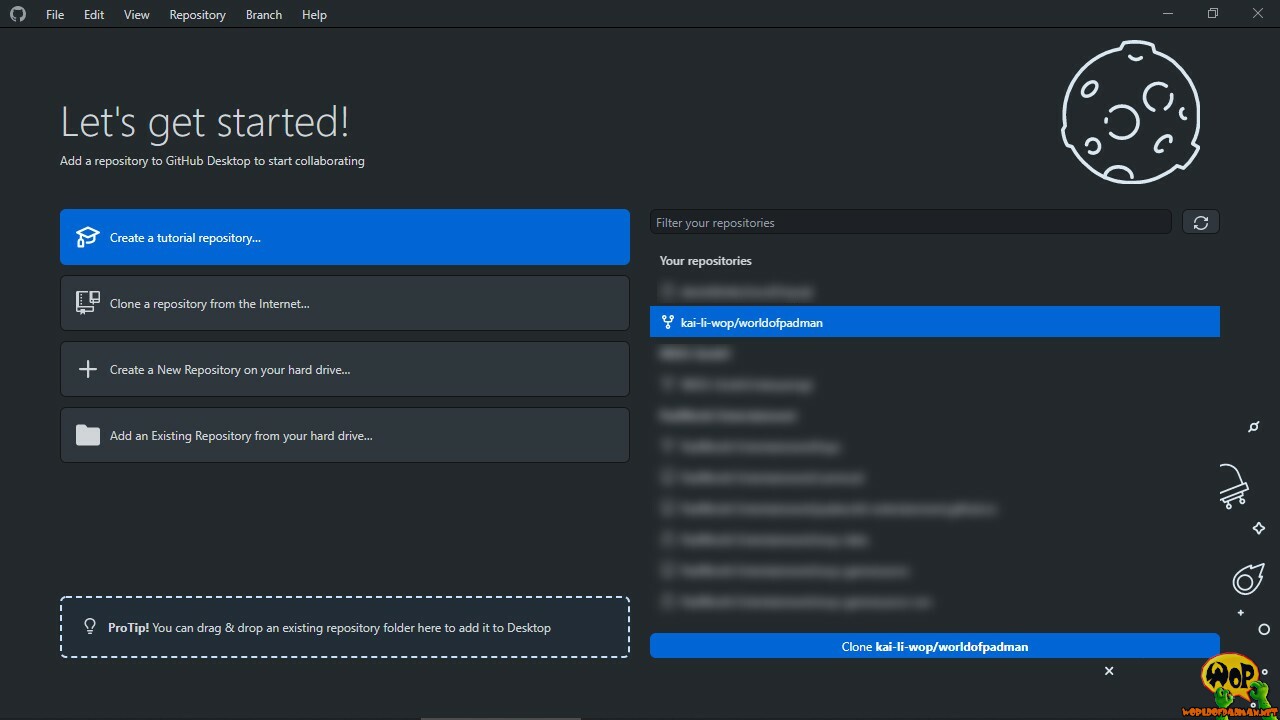
GitHub Desktop – Let’s get started!
Another dialog appears where you can specify the local folder on your computer. I recommend to enter a path without any spaces, because this caused problems for me afterwards. Confirm with “Clone”.
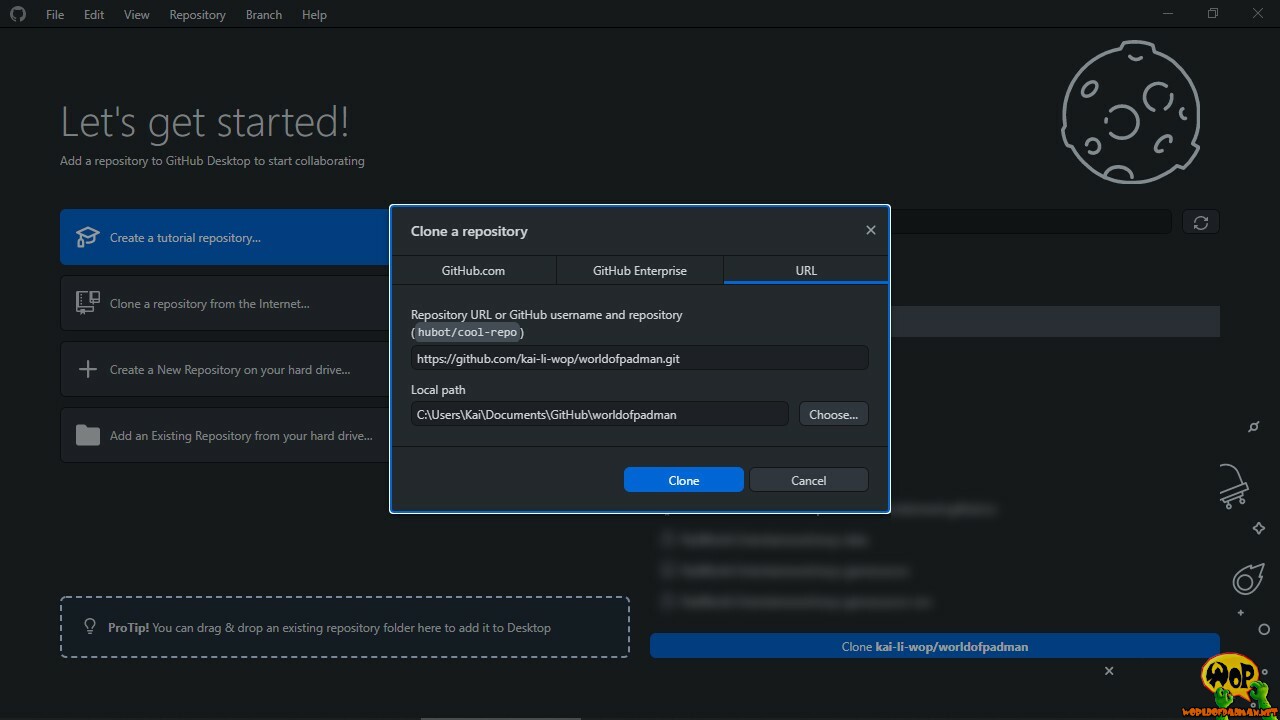
GitHub Desktop – Clone a repository
After completing the process, you will be asked: “How are you planning to use this fork?” If you want to support us directly, select “To contribute to the parent project”. If you want to tinker around on your own for now, select “For my own purposes”. I recommend the second option, because you can always send us your code changes afterwards via “pull request”.
The source code of World of Padman is now locally on your computer and you can start with your changes. For the further use of GitHub Desktop, you should look for additional tutorials on the Internet, since this tutorial is actually about compiling World of Padman and not so much about GitHub Desktop.
Visual Studio Code and Git
Visual Studio Code (VS Code) is a free source code editor that lets you work directly on the source code of World of Padman. By the way, it should not be mixed up with Visual Studio. Of course other editors work as well, if you like it very simple e.g. NotePad++, but we want to compile World of Padman directly from VS Code in the future. Another advantage is that VS Code works with workspaces and saves the editing state, the order of the opened files and their line position. So when you start VS Code you are immediately back where you left off before. Another strength is the many available plugins, some of which we will use in a moment.
First of all you have to install VS Code. Start the installer and follow the instructions. In the dialog, the option “Add to PATH (available after reboot)” should be selected under “Select additional tasks”. After starting, a few popups will be displayed immediately. One of them allows you to install a language pack for other languages, if you don’t know English that well. After that, a few basic settings can be made, for which I have no concrete recommendations for you.

Microsoft Visual Studio Code – Setup
Once the installation is complete, you can navigate to your local worldofpadman repository via “File” and “Open Folder” in the main menu and select the corresponding folder directly. After that VS Code should show you all files of the worldofpadman folder. By the way, Visual Studio Code also offers an integrated source code management, which can be accessed via the icon under the magnifying glass, but shows there that the currently opened folder is not a Git repository. This is due to the fact that VS Code does not include the version management system Git itself. So if you don’t want to use GitHub Desktop now, you have to install Git directly to make VS Code fit for version management.
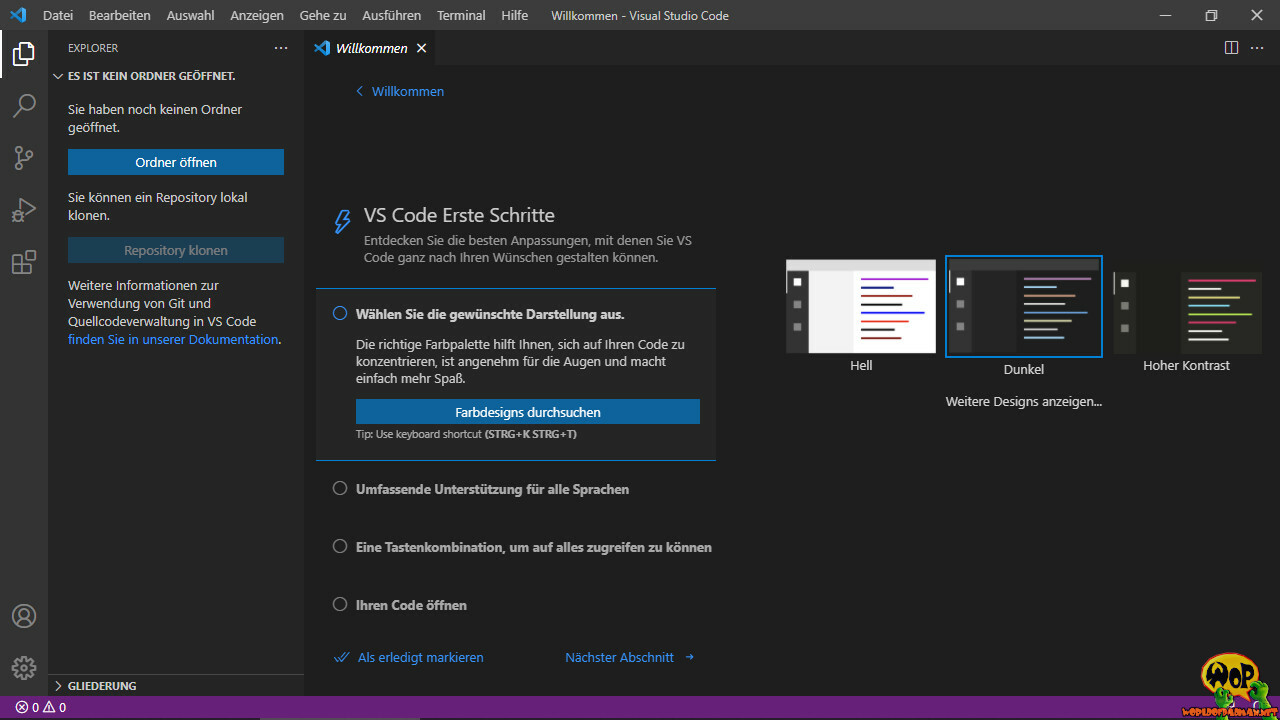
Microsoft Visual Studio Code – Welcome
So, if needed, go to the Git website and download the latest version there. Start the installer and follow the instructions. In the course of the dialog “Choosing the default editor used by Git” you can now select “Use Visual Studio Code as Git’s default editor”. In the following you can change a lot of other settings, but if you don’t know any better, you can leave the default settings as they are. If the installation is finished, you should restart VS Code at the latest now, so that Git is recognized.
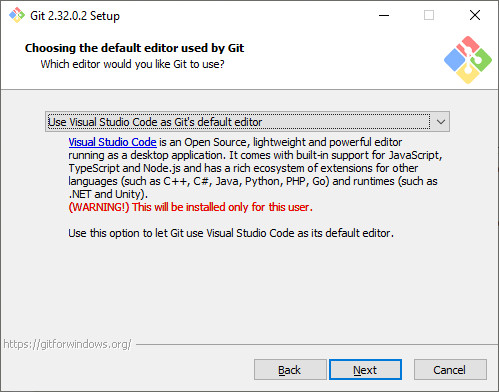
Git Setup – Selection of the default editor
Back to VS Code, because here we still need some extensions. In the extensions tab, at the very bottom below the magnifying glass, there is a search. Type in “C++” and a whole bunch of extensions will be listed. Find the extension “C++ IntelliSense, debugging, and code browsing” which comes directly from Microsoft and click install. The second extension you need to look for is called “CMake Tools”, also from Microsoft. Install it. Once this is done, a popup will appear at the bottom right asking if you want to configure CMake for ‘worldofpadman’, which you are welcome to confirm with “Yes”.
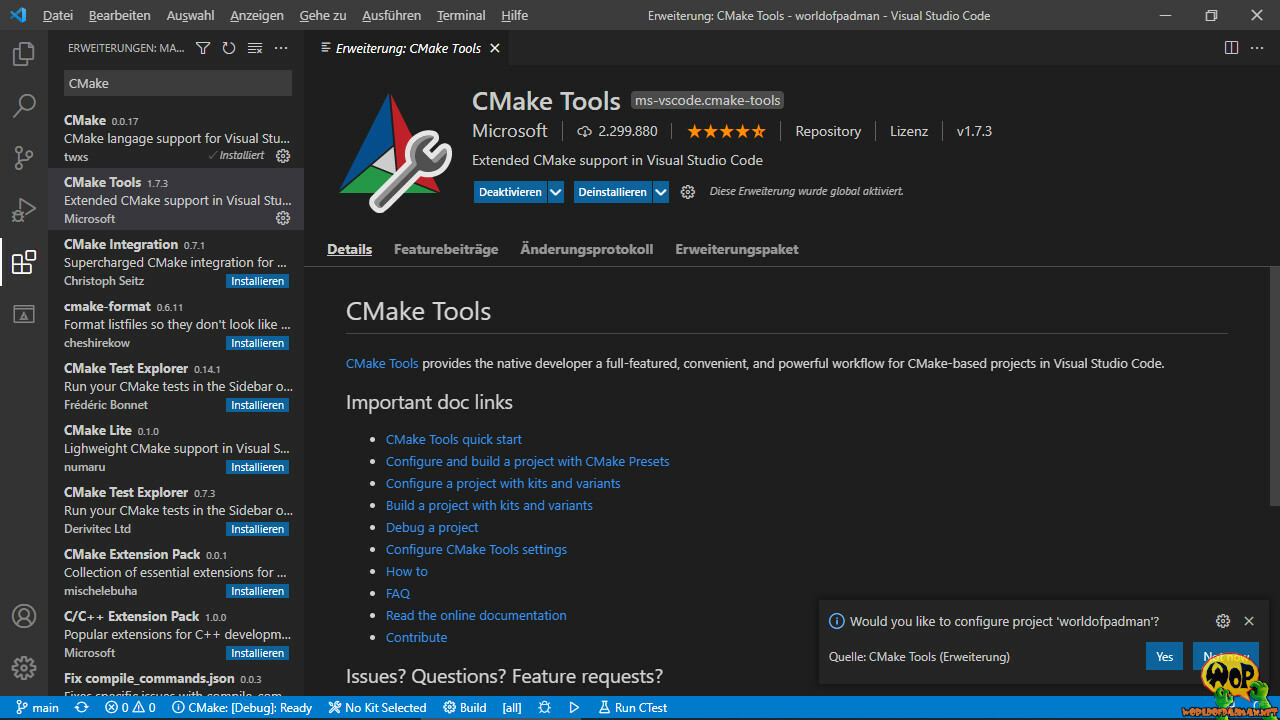
VS Code Plugin – CMake Tools
Visual Studio Build Tools and Compile
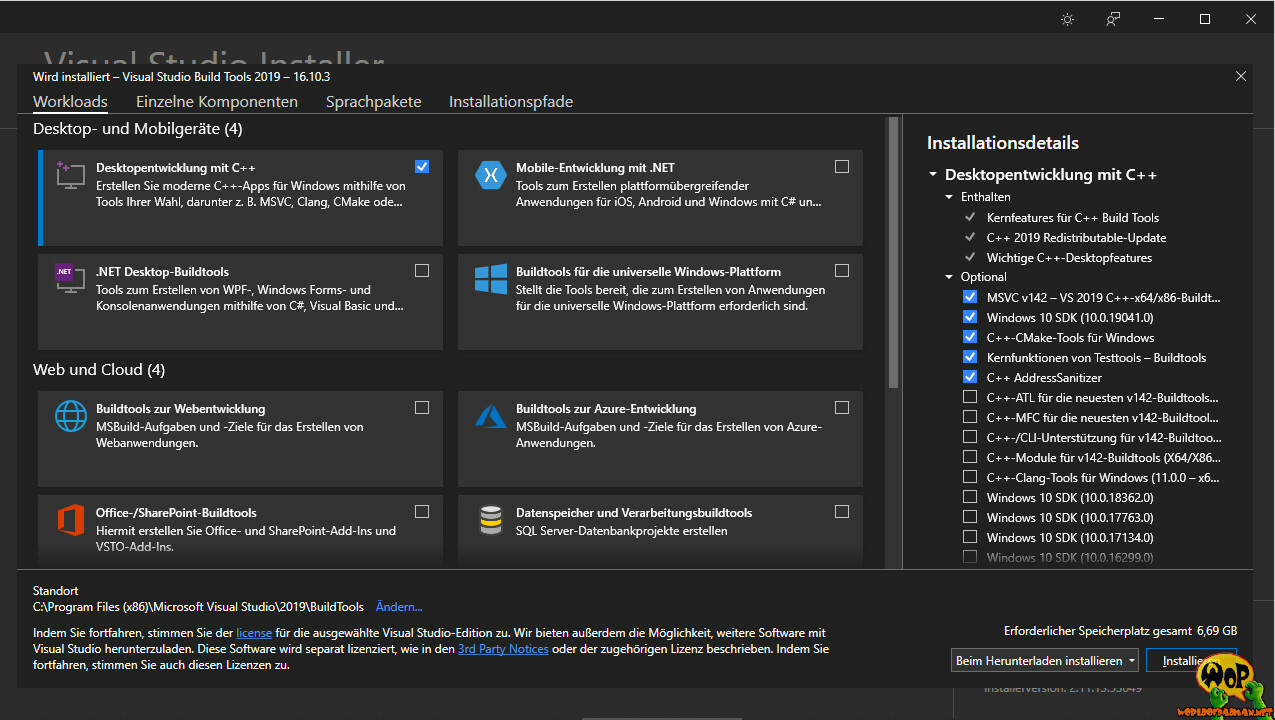
At the very bottom of the blue status bar of VS Code, next to the branch “main” in which you should initially be, you will now also see “CMake: [Debug] Ready” and “No Kit Selected”. The latter means that the actual compiler is still missing or VS Code cannot find a suitable compiler for the WoP source code. This is where the Visual Studio Build Tools for Visual Studio come into play, which we still have to download separately. We do not want to install the current version of Visual Studio here, but only the Build Tools. On the download page, you will therefore find the direct link to the Build Tools for Visual Studio 2019 further down, in the “Tools for Visual Studio 2019” section. First of all, only an online installer is downloaded, in which the corresponding components must be selected. Here it is sufficient to select and install the first option “Desktop development with C++”. The download and installation will probably take a little longer now, since it involves several GBytes.
Visual Studio Installer – Build Tools
After the installation is finished, go back to Visual Studio Code. At the bottom of the blue status bar, after entering your repository, you should be able to select a suitable kit by clicking on it next to “CMake: [Debug]: Ready”, where before it stated “No Kit Selected”. Please select “Visual Studio Build Tools 2019 Release – x86_amd64”. Finally you can start the compilation process and compile WoP for the first time. To do this, you can click on “Build” in the blue status bar at the bottom. Now all libraries and binaries for all three operating systems, i.e. Windows, Linux and MacOS as well as the QVMs are built completely. These are then located in the “build” subdirectory of your worldofpadman repository, as well as in the “wop” and “vm” subdirectories contained therein.
If you don’t want to build all files all the time, but maybe just the QVM for the menu (UI), you can click ‘[ALL_BUILD]’ and select ‘qvm_ui’ from the list. By the way, it is quite normal that you get a lot of warnings during the compilation process. As long as there is nothing in the console with “Fatal Error” and at the end you get “Build finished with exit code 0”, the process has run successfully. If something breaks, you can simply delete the entire “build” directory and Visual Studio Code will automatically recreate the build files for you.